|
||||
|
|
Глава 12Документы XSL-FO В этой главе мы продолжим работу с XSL-FO. Здесь мы рассмотрим работу со списками, рисунками и колонками, размещение текста, создание многостраничных последовательностей и другое. По прочтении этой главы вы усвоите основы работы с XSL-FO — по крайней мере, с той частью, которая реализована в современном программном обеспечении. Я начну главу со списков XSL-FO. Создание списков XSL-FOКак мы видели в главе 11, таблицы XSL-FO работают во многом так же, как в HTML, и это в той же мере относится к спискам. Как и в HTML, список XSL выводит вертикальный список элементов. Для создания списков служат четыре элемента XSL-FO: • <fo:list-block>; • <fo:list-item>; • <fo:list-item-label>; • <fo:list-item-body>. Весь список заключается в элемент <fo:list-block>, и каждый элемент списка — в элемент <fo:list-item>. Для создания подписи к элементу списка служит элемент <fo:list-item-label>, а для вставки данных в каждый элемент списка — элемент <fo:list-item-body>. Пример lists.xsl(листинг 12.1) преобразует planets.xmlв список формата XSL-FO, в котором каждый элемент списка отображает название планеты. Листинг 12.1. lists.xsl <?xml version="1.0"?> <xsl:stylesheet xmlns:xsl="http://www.w3.org/1999/XSL/Transform" xmlns:fo="http://www.w3.org/1999/XSL/Format" version="1.0"> <xsl:template match="PLANETS" <fo:root xmlns:fo="http://www.w3.org/1999/XSL/Format"> <fo:layout-master-set> <fo:simple-page-master master-name="page" page-height="400mm" page-width="300mm" margin-top="10mm" margin-bottom="10mm" margin-left="20mm" margin-right="20mm"> <fo:region-body margin-top="0mm" margin-bottom="10mm" margin-left="0mm" margin-right="0mm"/> <fo:region-after extent="10mm"/> </fo:simple-page-master> </fo:layout-master-set> <fo:page-sequence master-name="page"> <fo:flow flow-name="xsl-region-body"> <fo:block font-size="24pt">The Planets Table</fo:block> <fo:list-block provisional-distance-between-starts="15mm" provisional-label-separation="5mm"> <xsl:apply-templates/> </fo:list-block> </fo:flow> </fo:page-sequence> </fo:root> </xsl:template> <xsl:template match="PLANET"> <fo:list-item line-height="20mm"> <fo:list-item-label> <fo:block font-family="sans-serif" font-size="36pt"> <xsl:number/> <xsl:text>. </xsl:text> </fo:block> </fo:list-item-label> <xsl:apply-templates/> </fo:list-item> </xsl:template> <xsl:template match="NAME"> <fo:list-item-body> <fo:block font-family="sans-serif" font-size="36pt"> <xsl:value-of select='.'/> </fo:block> </fo:list-item-body> </xsl:template> <xsl:template match="MASS"> </xsl:template> <xsl:template match="RADIUS"> </xsl:template> <xsl:template match="DENSITY"> </xsl:template> <xsl:template match="DAY"> </xsl:template> <xsl:template match="DISTANCE"> </xsl:template> </xsl:stylesheet> Вот результирующий документ XSL-FO, lists.fo(листинг 12.2). Листинг 12.2. lists.fo <?xml version="1.0" encoding="UTF-8"?> <fo:root xmlns:fo="http://www.w3.org/1999/XSL/Format"> <fo:layout-master-set> <fo:simple-page-master margin-right="20mm" margin-left="20mm" margin-bottom="10mm" margin-top="10mm" page-width="300mm" page-height="400mm" master-name="page"> <fo:region-body margin-right="0mm" margin-left="0mm" margin-bottom="10mm" margin-top="0mm"/> <fo:region-after extent="10mm"/> </fo:simple-page-master> </fo:layout-master-set> <fo:page-sequence master-name="page"> <fo:flow flow-name="xsl-region-body"> <fo:block font-size="24pt">The Planets Table</fo:block> <fo:list-block provisional-label-separation="5mm" provisional-distance-between-starts="15mm"> <fo:list-item line-height="20mm"> <fo:list-item-label> <fo:block font-size="36pt" font-family="sans-serif"> 1. </fo:block> </fo:list-item-label> <fo:list-item-body> <fo:block font-size="36pt" font-family="sans-serif"> Mercury </fo:block> </fo:list-item-body> </fo:list-item> <fo:list-item line-height="20mm"> <fo:list-item-label> <fo:block font-size="36pt" font-family="sans-serif"> 2. </fo:block> </fo:list-item-label> <fo:list-item-body> <fo:block font-size="36pt" font-family="sans-serif"> Venus </fo:block> </fo:list-item-body> </fo:list-item> <fo:list-item line-height="20mm"> <fo:list-item-label> <fo:block font-size="36pt" font-family="sans-serif"> 3. </fo:block> </fo:list-item-label> <fo:list-item-body> <fo:block font-size="36pt" font-family="sans-serif"> Earth </fo:block> </fo:list-item-body> </fo:list-item> </fo:list-block> </fo:flow> </fo:page-sequence> </fo:root> Результирующий файл PDF со списком в Adobe Acrobat Reader показан на рис. 12.1. 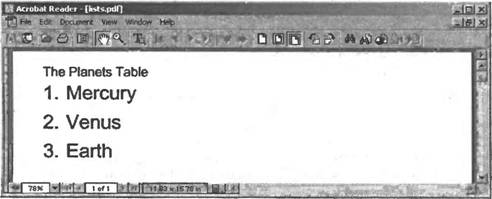 Рис. 12.1. Список, отформатированный при помощи XSL-FO, в Adobe Acrobat Reader Давайте теперь подробнее рассмотрим, как работает lists.fo, и изучим форматирующие объекты для списка. Создание списка: <fo:list-block>Для начала воспользуйтесь элементом <fo:list-block>, чтобы создать список XSL-FO; этот объект содержит элементы <fo:list-item>, содержащие данные списка. С элементом <fo:list-block>можно применять следующие свойства: • общие свойства доступа: source-document, role; • общие звуковые свойства: azimuth, cue-after, cue-before, elevation, pause-after, pause-before, pitch, pitch-range, play-during, richness, speak, speak-header, speak-numeral, speak-punctuation, speech-rate, stress, voice-family, volume; • общие свойства границ, заполнения и заднего фона: background-attachment, background-color, background-image, background-repeat, background-position-horizontal, background-position-vertical, border-before-color, border-before-style, border-before-width, border-after-color, border-after-style, border-after-width, border-start-color, border-start-style, border-start-width, border-end-color, border-end-style, border-end-width, border-top-color, border-top-style, border-top-width, border-bottom-color, border-bottom-style, border-bottom-width, border-left-color, border-left-style, border-left-width, border-right-color, border-right-style, border-right-width, padding-before, padding-after, padding-start, padding-end, padding-top, padding-bottom, padding-left, padding-right; • общие свойства полей: margin-top, margin-bottom, margin-left, margin-right, space-before, space-after, start-indent, end-indent; • break-after; • break-before; • id; • keep-together; • keep-with-next; • keep-with-previous; • provisional-distance-between-starts; • provisional-label-separation; • relative-position. Ниже показано, как начинается список в листинге 12.2. В данном случае я задаю значения для свойства provisional-distance-between-starts, определяющего предпочитаемое расстояние от начального отступа метки элемента списка и начального отступа тела элемента списка, и для свойства provisional-label-separation, определяющего предпочитаемое расстояние между концом метки элемента списка (такой, как маркер или номер) и началом тела элемента списка: <fo:list-block provisional-label-separation="5mm" provisional-distance-between-starts="15mm"> . . . </fo:list-block> Создание элементов списка: <fo:list-item>Затем при помощи элемента <fo:list-item>нужно поместить в список метку и тело элемента списка. В каждом элементе списка должен присутствовать один из этих объектов. С элементом <fo:list-item>можно применять следующие свойства: • общие свойства доступа: source-document, role; • общие звуковые свойства: azimuth, cue-after, cue-before, elevation, pause-after, pause-before, pitch, pitch-range, play-during, richness, speak, speak-header, speak-numeral, speak-punctuation, speech-rate, stress, voice-family, volume; • общие свойства границ, заполнения и заднего фона: background-attachment, background-color, background-image, background-repeat, background-position-horizontal, background-position-vertical, border-before-color, border-before-style, border-before-width, border-after-color, border-after-style, border-after-width, border-start-color, border-start-style, border-start-width, border-end-color, border-end-style, border-end-width, border-top-color, border-top-style, border-top-width, border-bottom-color, border-bottom-style, border-bottom-width, border-left-color, border-left-style, border-left-width, border-right-color, border-right-style, border-right-width, padding-before, padding-after, padding-start, padding-end, padding-top, padding-bottom, padding-left, padding-right; • общие свойства полей: margin-top, margin-bottom, margin-left, margin-right, space-before, space-after, start-indent, end-indent; • break-after; • break-before; • id; • keep-together; • keep-with-next; • keep-with-previous; • relative-align; • relative-position. В lists.foвстречается три элемента <fo:list-item>: <fo:list-block provisional-label-separation="5mm" provisional-distance-between-starts="15mm"> <fo:list-item line-height="20mm"> . . . </fo:list-item> <fo:list-item line-height="20mm"> . . . </fo:list-item> <fo:list-item line-height="20mm"> . . . </fo:list-item> </fo:list-block> Теперь можно создать метку и добавить данные в каждый элемент списка. Создание меток элемента списка: <fo:list-item-label>Метка для элемента списка создается элементом <fo:list-item-label>, при помощи которого можно перенумеровать или пометить дело элемента списка. К элементу <fo:list-item-label>можно применять следующие свойства: • общие свойства доступа: source-document, role; • id; • keep-together. В lists.fo я использую элементы <fo:block>для отображения номера планеты в качестве метки элемента списка ( lists.xslнаходит этот номер при помощи <xsl:number>и вставляет его в lists.fo): <fo:list-block provisional-label-separation="5mm" provisional-distance-between-starts="15mm"> <fo:list-item line-height="20mm"> <fo:list-item-label> <fo:block font-size="36pt" font-family="sans-serif"> 1. </fo:block> </fo:list-item-label> . . . </fo:list-item> <fo:list-item line-height="20mm"> <fo:list-item-label> <fo:block font-size="36pt" font-familу="sans-serif"> 2. </fo:block> </fo:list-item-label> . . . </fo:list-item> <fo:list-item line height="20mm"> <fo:list-item-label>
3. </fo:block> </fo:list-item-label> . . . </fo:list-item> </fo:list-block> Все, что осталось, — добавить в этот список сами данные. Создание тел элементов списка: <fo:list-item-body>Для включения тела элемента списка служит элемент <fo:list-item-body>. Заметьте, что для форматирования тела элемента списка требуемым вам образом вы можете включить в элемент <fo:list-item-body>объект <fo:block>. С элементом <fo:list-item-body>можно применять следующие свойства: • общие свойства доступа: source-document, role; • id; • keep-together. В lists.foэлементы <fo:list-item-body>содержат названия планет: <fo:list-block provisional-label-separation="5mm" provisional-distance-between-starts="15mm"> <fo:list-item line-height="20mm"> <fo:list-item-label> <fo:block font-size="36pt" font-family="sans-serif"> 1. </fo:block> </fo:list-item-label> <fo:list-item-body>
Mercury </fo:block> </fo:list-item-body> </fo:list-item> <fo:list-item line-height="20mm"> <fo:list-item-label> <fo:block font-size="36pt" font-family="sans-serif"> 2. </fo:block> </fo:list-item-label> <fo:list-item-body>
Venus </fo:block> </fo:list-item-body> </fo:list-item> <fo:list-item line-height="20mm"> <fo:list-item-label> <fo:block font-size="36pt" font-family="sans-serif"> 3. </fo:block> </fo:list-item-label> <fo:list-item-body>
Earth </fo:block> </fo:list-item-body> </fo:list-item> </fo:list-block> На этом завершается список, который был показан на рис. 12.1. Работа со списками приемлема в XSL-FO, но я предпочитаю выводить данные при помощи таблиц или простых блоков. Тем не менее, полезно знать, что списки существуют, и ими можно пользоваться. Размещение текста при помощи контейнеров блоков: <fo:block-container>Процессоры XSL-FO в одном отношении похожи на браузеры HTML: они вставляют блоки в «поток» (flow) страницы, что означает, что эти блоки могут перемещаться по документу, как в HTML-браузере. С другой стороны, иногда бывает важно поместить элементы в странице на определенные места. И в XSL-FO у вас есть возможность разместить элементы либо в абсолютных координатах страницы, либо в координатах относительно других элементов. Для демонстрации я воспользуюсь элементом <fo:block-container>, который, как можно предположить, выступает в качестве контейнера блоков. Удобно то, что такие контейнеры блоков поддерживают свойства абсолютного позиционирования, которые сами блоки не поддерживают. С элементом <fo:block-container>можно применять следующие свойства: • общие свойства абсолютной позиции: absolute-position, top, right, bottom, left; • общие свойства границ, заполнения и заднего фона: background-attachment, background-color, background-image, background-repeat, background-position-horizontal, background-position-vertical, border-before-color, border-before-style, border-before-width, border-after-color, border-after-style, border-after-width, border-start-color, border-start-style, border-start-width, border-end-color, border-end-style, border-end-width, border-top-color, border-top-style, border-top-width, border-bottom-color, border-bottom-style, border-bottom-width, border-left-color, border-left-style, border-left-width, border-right-color, border-right-style, border-right-width, padding-before, padding-after, padding-start, padding-end, padding-top, padding-bottom, padding-left, padding-right; • общие свойства полей для блоков: margin-top, margin-bottom, margin-left, margin-right, space-before, space-after, start-indent, end-indent; • block-progression-dimension; • break-after; • break-before; • clip; • display-align; • height; • id; • inline-progression-dimension; • keep-together; • keep-with-next; • keep-with-previous; • overflow; • reference-orientation; • span; • width; • writing-mode. В следующем примере (листинг 12.3) я использую контейнеры блоков как оболочки для блоков, которые я хочу поместить в определенные места страницы Листинг 12.3. blockcontainer.fo<?xml version="1.0" encoding="UTF-8"?> <fo:root xmlns:fo="http://www.w3.org/1999/XSL/Format"> <fo:layout-master-set> <fo:simple-page-master margin-right="20mm" margin-left="20mm" margin-bottom="10mm" margin-top="10mm" page-width="300mm" page-height="400mm" master-name="page"> <fo:region-body margin-right="0mm" margin-left="0mm" margin-bottom="10mm" margin-top="0mm"/> <fo:region-after extent="10mm"/> </fo:simple-page-master> </fo:layout-master-set> <fo:page-sequence master-name="page"> <fo:flow flow-name="xsl-region-body"> <fo:block-container height="4cm" width="12cm" top="0cm" left="0cm" position="absolute"> <fo:block text-align="start" line-height="18pt" font-family="sans-serif" font-weight="bold" font-size="14pt"> Starpowder </fo:block> <fo:block text-align="start" line-height="18pt" font-family="sans-serif" font-size="14pt"> The Starpowder Building: </fo:block> <fo:block text-align="start" line-height="18pt" font-family="sans-serif" font-size="14pt"> 1 Starpowder Avenue </fo:block> <fo:block text-align="start" line-height="18pt" font-family="sans-serif" font-size="14pt"> New York. NY. 10011 </fo:block> </fo:block-container> <fo:block-container height="1cm" width="6cm" top="0cm" left="14cm" position="absolute"> <fo:block text-align="start" line-height="22pt" font-family="sans-serif" font-size="23pt"> Invoice </fo:block> </fo:block-container> <fo:block-container border-color="black" border-style="solid" border-width="1pt" height="0.7cm" width="3.5cm" top="1.2cm" left="12.0cm" padding="2pt" position="absolute"> <fo:block text-align="start" line-height="15pt" font-family="sans-serif" font-size="12pt"> Date </fo:block> </fo:block-container> <fo:block-container border-color="black" border-style="solid" border-width="1pt" height="0.7cm" width="3.5cm" top="1.9cm" left="12.0cm" padding="2pt" position="absolute"> <fo:block text-align="start" line-height="15pt" font-family="sans-serif" font-size="12pt"> January 1, 2002 </fo:block> </fo:block-container> <fo:block-container border-color="black" border-style="solid" border-width="1pt" height="0.7cm" width="3.5cm" top="1.2cm" left="15.5cm" padding="2pt" position="absolute"> <fo:block text-align="start" line-height="15pt" font-family="sans-serif" font-size="12pt"> Terms </fo:block> </fo:block-container> <fo:block-container border-color="black" border-style="solid" border-width="1pt" height="0.7cm" width="3.5cm" top="1.9cm" left="15.5cm" padding="2pt" position="absolute"> <fo:block text-align="start" line-height="15pt" font-family="sans-serif" font-size="12pt"> Immediate </fo:block> </fo:block-container> <fo:block-container border-color="black" border-style="solid" border-width="1pt" height="1.0cm" width="9cm" top="3cm" left="0cm" padding="2pt" position="absolute"> <fo:block text-align="center" line-height="22pt" font-family="sans-serif" font-size="18pt"> Description of Service </fo:block> </fo:block-container> <fo:block-container border-color="black" border-style="solid" border-width="1pt" height="4cm" width="9cm" top="4.0cm" left="0cm" padding="2pt" position="absolute"> <fo:block text-align="start" line-height="15pt" font-family="sans-serif" font-size="12pt"> </fo:block> </fo:block-container> <fo:block-container border-color="black" border-style="solid" border-width="1pt" height="1.0cm" width="9cm" top="3cm" left="10cm" padding="2pt" position="absolute"> <fo:block text-align="center" line-height="22pt" font-family="sans-serif" font-size="18pt"> Address for Payment: </fo:block> </fo:block-container> <fo:block-container border-color="black" border-style="solid" border-width="1pt" height="4cm" width="9cm" top="4.0cm" left="10cm" padding="2pt" position="absolute"> <fo:block text-align="start" line-height="15pt" font-family="sans-serif" font-size="12pt"> </fo:block> </fo:block-container> </fo:flow> </fo:page-sequence> </fo:root> Документ PDF, который процессор fop создаст из blockcontainers.fo, показан на рис. 12.2. Как можно видеть на рисунке, я поместил различные блоки в разные места документа. Некоторые прямоугольники должны быть размещены сразу же поверх других, поэтому в данном случае размещение играет важную роль.  Рис. 12.2. Применение контейнеров блоков На самом деле работать с контейнерами блоков просто. Взгляните, например, на прямоугольник «Description of Service» (Описание услуги) на рис. 12.2. Я создал его при помощи двух контейнеров блоков: один из них содержит заголовок «Description of Service», а второй — пустой прямоугольник сразу под первым. Для создания прямоугольника заголовка я применил элемент <fo:block-container>, указав размеры прямоугольника в свойствах height(высота) и width(ширина) и задав границу в свойстве border-width. Положение прямоугольника на странице я задал, установив свойство positionв absoluteи установив свойства left(левый) и top(верхний) для размещения верхнего левого угла прямоугольника по отношению к верхнему левому углу страницы: <fo:block-container border-color="black" border-style="solid" border-width="1pt" height="1.0cm" width="9cm" top="3cm" left="0cm" padding="2pt" position="absolute"> . . . </fo:block-container> Теперь я могу включить в контейнер блок, содержащий заголовок «Description of Service»: <fo:block-container border-color="black" border-style="solid" border-width="1pt" height="1.0cm" width="9cm" top="3cm" left="0cm" padding="2pt" position="absolute"> <fo:block text-align="center" line-height="22pt" font-family="sans-serif" font-size="18pt"> Description of Service </fo:block> </fo:block-container> После этого я размещаю пустой прямоугольник сразу под прямоугольником заголовка: </fo:block-container> <fo:block-container border-color="black" border-style="solid" border-width="1pt" height="1.0cm" width="9cm" top="3cm" left="0cm" padding="2pt" position="absolute"> <fo:block text-align="center" line-height="22pt" font-family="sans-serif" font-size="18pt"> Description of Service </fo:block> </fo:block-container> <fo:block-container border-color="black" border-style="solid" border-width="1pt" height="4cm" width="9cm" top="4.0cm"
<fo:block text-align="start" line-height="15pt" font-family="sans-serif" font-size="12pt"> </fo:block> </fo:block-container> Результат показан на рис. 12.2. Я считаю эту возможность одной из самых важных в XSL-FO: вы можете помещать элементы в точности туда, куда вам нужно. Допустимо полагаться на поток объектов, создаваемый процессором XSL-FO, но иногда требуется расположить объекты в определенном месте, и теперь вы знаете, как это сделать. Встроенные форматирующие объектыПомимо объектов блока, в XSL-FO можно также создавать встроенные (inline) объекты. Встроенный объект представляет собой часть большей форматирующей области, такой как блок; например, встроенный объект может представлять одно или два слова в блоке. Встроенные объекты обычно применяются для форматирования части текста после того, как этот текст был размещен на странице в соответствии с обычным потоком. Можно увеличить первый символ в абзаце, выделить всю первую строку голубым цветом, вставить номера страниц, добавить рисунки и т.д. Встроенные объекты можно применять для форматирования частей текста блока; например, в главе 11 мы видели, как свойство text-decorationобъекта <fo:inline>применялось для подчеркивания текста: <xsl:template match="PLANET/MASS"> <fo:block font-size="24pt" line-height="32pt" font-family="Times"> <fo:inline text-decoration="underline"> Mass; </fo:inline>: <xsl:apply-templates/> [Earth = 1] </fo:block> </xsl:template> В следующем списке перечислены встроенные форматирующие элементы: • <fo:bidi-override>; • <fo:character>; • <fo:initial-property-set>; • <fo:external-graphic>; • <fo:instream-foreign-object>; • <fo:inline>; • <fo:inline-container>; • <fo:leader>; • <fo:page-number>; • <fo:page-number-citation>. Я опишу несколько самых распространенных встроенных элементов, начав с самого <fo:inline>. Создание встроенных областей: <fo:inline>Как вы уже видели в главе 11, при помощи элемента <fo:inline>вы можете форматировать части текста, задавая для них задний фон, подчеркивая текст или заключая текст в границы. Элемент позволяет форматировать встроенную область из нескольких слов в блоке текста как если бы они сами представляли собой блок. С элементом <fo:inline>можно применять следующие свойства: • общие свойства доступа: source-document, role; • общие звуковые свойства: azimuth, cue-after, cue-before, elevation, pause-after, pause-before, pitch, pitch-range, play-during, richness, speak, speak-header, speak-numeral, speak-punctuation, speech-rate, stress, voice-family, volume; • общие свойства границ, заполнения и заднего фона: background-attachment, background-color, background-image, background-repeat, background-position-horizontal, background-position-vertical, border-before-color, border-before-style, border-before-width, border-after-color, border-after-style, border-after-width, border-start-color, border-start-style, border-start-width, border-end-color, border-end-style, border-end-width, border-top-color, border-top-style, border-top-width, border-bottom-color, border-bottom-style, border-bottom-width, border-left-color, border-left-style, border-left-width, border-right-color, border-right-style, border-right-width, padding-before, padding-after, padding-start, padding-end, padding-top, padding-bottom, padding-left, padding-right; • общие свойства шрифтов: font-family, font-size, font-stretch, font-size-adjust, font-style, font-variant, font-weight; • общие свойства встроенных полей: space-end, space-start; • alignment-adjust; • baseline-identifier; • baseline-shift; • color; • dominant-baseline; • id; • keep-together; • keep-with-next; • keep-with-previous; • line-height; • line-height-shift-adjustment; • relative-position; • text-decoration; • visibility; • z-index. Например, мы уже видели, как подчеркнуть отдельное слово внутри остального текста при помощи свойства text-decoration: <xsl:template match="PLANET/MASS"> <fo:block font-size="24pt" line-height="32pt" font-familу="Times"> <fo:inline text-decoration="underline"> Mass </fo:inline>: <xsl:apply-templates/> [Earth = 1] </fo:block> </xsl:template> Мы еще встретим элемент <fo:inline>, когда будем рассматривать сноски позже в этой главе. Обработка отдельных символов: <fo:character>Как можно догадаться по имени, объект <fo:character>позволяет работать с отдельными символами в документе. Одна из областей применения <fo:character>— случай, когда нужно заменить определенные символы на другие. В следующем примере я выбираю элемент с именем <PASSWORD>и заменяю его символы на символ «*»: <xsl:template match="PASSWORD"> <fo:character character="*"> <xsl:value-of select="."/> </fo:character> </xsl:template> При помощи элемента <fo:character>можно форматировать отдельные символы, как в следующем случае, где символы в слове «HELLO» выделяются различными цветами: <fo:character character="H" font-size="24pt" color="red"/> <fo:character character="E" font-size="24pt" color="yellow"/> <fo:character character="L" font-size="24pt" color="green"/> <fo:character character="L" font-size="24pt" color="blue"/> <fo:character character="O" font-size="24pt" color="orange"/> С элементом <fo:character>можно применять следующие свойства: • общие звуковые свойства: azimuth, cue-after, cue-before, elevation, pause-after, pause-before, pitch, pitch-range, play-during, richness, speak, speak-header, speak-numeral, speak-punctuation, speech-rate, stress, voice-family, volume; • общие свойства границ, заполнения и заднего фона: background-attachment, background-color, background-image, background-repeat, background-position-horizontal, background-position-vertical, border-before-color, border-before-style, border-before-width, border-after-color, border-after-style, border-after-width, border-start-color, border-start-style, border-start-width, border-end-color, border-end-style, border-end-width, border-top-color, border-top-style, border-top-width, border-bottom-color, border-bottom-style, border-bottom-width, border-left-color, border-left-style, border-left-width, border-right-color, border-right-style, border-right-width, padding-before, padding-after, padding-start, padding-end, padding-top, padding-bottom, padding-left, padding-right; • общие свойства шрифтов: font-family, font-size, font-stretch, font-size-adjust, font-style, font-variant, font-weight; • общие свойства переносов: country, language, script, hyphenate, hyphenation-character, hyphenation-push-character-count, hyphenation-remain-character-count; • общие свойства встроенных полей: space-end, space-start; • alignment-adjust; • treat-as-word-space; • baseline-identifier; • baseline-shift; • character; • color; • dominant-baseline; • font-height-override-after; • font-height-override-before; • glyph-orientation-horizontal; • glyph-orientation-vertical; • id; • keep-with-next; • keep-with-previous; • letter-spacing; • line-height; • line-height-shift-adjustment; • relative-position; • score-spaces; • suppress-at-line-break; • text-decoration; • text-shadow; • text-transform; • word-spacing. Создание номеров страниц: <fo:page-number>Встроенный форматирующий объект <fo:page-number>создает встроенную область, отображающую номер текущей страницы. Например: <fo:block> You are now reading page <fo:page-number/>. </fo:block> С элементом <fo:page-number>можно применять следующие свойства: • общие свойства доступа: source-document, role; • общие звуковые свойства: azimuth, cue-after, cue-before, elevation, pause-after, pause-before, pitch, pitch-range, play-during, richness, speak, speak-header, speak-numeral, speak-punctuation, speech-rate, stress, voice-family, volume; • общие свойства границ, заполнения и заднего фона: background-attachment, background-color, background-image, background-repeat, background-position-horizontal, background-position-vertical, border-before-color, border-before-style, border-before-width, border-after-color, border-after-style, border-after-width, border-start-color, border-start-style, border-start-width, border-end-color, border-end-style, border-end-width, border-top-color, border-top-style, border-top-width, border-bottom-color, border-bottom-style, border-bottom-width, border-left-color, border-left-style, border-left-width, border-right-color, border-right-style, border-right-width, padding-before, padding-after, padding-start, padding-end, padding-top, padding-bottom, padding-left, padding-right; • общие свойства шрифтов: font-family, font-size, font-stretch, font-size-adjust, font-style, font-variant, font-weight; • общие свойства встроенных полей: space-end, space-start; • alignment-adjust; • baseline-identifier; • baseline-shift; • dominant-baseline; • id; • keep-with-next; • keep-with-previous; • letter-spacing; • line-height; • line-height-shift-adjustment; • relative-position; • score-spaces; • text-decoration; • text-shadow; • text-transform; • word-spacing. Пример применения номеров страниц будет показан при обсуждении последовательностей страниц в конце этой главы. Вставка графики: <fo:external-graphic>Популярный элемент при форматировании XSL-FO — <fo:external-graphic>, при помощи которого можно вставить в документ рисунок. С элементом <fo:external-graphic>можно применять следующие свойства: • общие свойства доступа: source-document, role; • общие звуковые свойства: azimuth, cue-after, cue-before, elevation, pause-after, pause-before, pitch, pitch-range, play-during, richness, speak, speak-header, speak-numeral, speak-punctuation, speech-rate, stress, voice-family, volume; • общие свойства границ, заполнения и заднего фона: background-attachment, background-color, background-image, background-repeat, background-position-horizontal, background-position-vertical, border-before-color, border-before-style, border-before-width, border-after-color, border-after-style, border-after-width, border-start-color, border-start-style, border-start-width, border-end-color, border-end-style, border-end-width, border-top-color, border-top-style, border-top-width, border-bottom-color, border-bottom-style, border-bottom-width, border-left-color, border-left-style, border-left-width, border-right-color, border-right-style, border-right-width, padding-before, padding-after, padding-start, padding-end, padding-top, padding-bottom, padding-left, padding-right; • общие свойства встроенных полей: space-end, space-start; • alignment-adjust; • baseline-identifier; • baseline-shift; • block-progression-dimension; • content-height; • content-type; • content-width; • dominant-baseline; • height; • id; • inline-progression-dimension; • keep-with-next; • keep-with-previous; • line-height; • line-height-shift-adjustment; • relative-position; • overflow; • scaling; • scaling-method; • src; • width. Как в HTML, можно устанавливать размер рисунка в документе — в XSL-FO для этого служат свойства content-height, content-widthи scaling; если их не задать, рисунок будет отображен в своем первоначальном размере. Следующий пример, graphics.fo(листинг 12.4), отображает рисунок, xslfo.jpg, и подпись к нему: Листинг 12.4. graphics.fo <?xml version="1.0" encoding="UTF-8"?> <fo:root xmlns:fo="http://www.w3.org/1999/XSL/Format"> <fo:layout-master-set> <fo:simple-page-master margin-right="20mm" margin-left="20mm" margin-bottom="10mm" margin-top="10mm" page-width="300mm" page-height="400mm" master-name="page"> <fo:region-body margin-right="0mm" margin-left="0mm" margin-bottom="10mm" margin-top="0mm"/> <fo:region-after extent="10mm"/> </fo:simple-page-master> </fo:layout-master-set> <fo:page-sequence master-name="page"> <fo:flow flow-name="xsl-region-body"> <fo:block space-after="12pt" font-weight="bold" font-size="36pt" text-align="center"> Using Graphics </fo:block> <fo:block text-align="center"> <fo:external-graphic src="file:xslfo.jpg"/> </fo:block> <fo:block space-before="10pt" text-align="center" font-size="24pt"> An image embedded in a document. </fo:block> </fo:flow> </fo:page-sequence> </fo:root> Документ PDF, созданный из graphics.fo, показан на рис. 12.3. 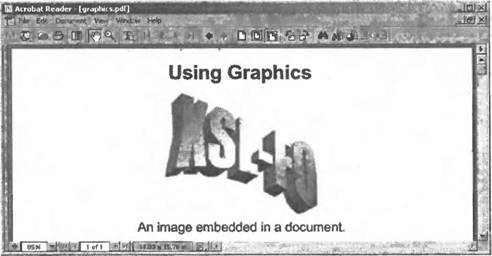 Рис. 12.3. Отображение рисунка при помощи форматирующих объектов Вставить рисунок в результирующий документ легко, если вставку поддерживает ваше программное обеспечение. Процессор fop теперь поддерживает рисунки (еще несколько версий назад он этого не делал), поэтому вы можете вставлять рисунки при помощи элемента <fo:external-graphic>следующим образом: <fo:block text-align="center"> <fo:external-graphic src="file:xslfo.jpg"/> </fo:block> Форматирование первых строк: <fo:initial-property-set>При помощи элемента <fo:initial-property-set>вы можете задать свойства для первой строки в блоке и отформатировать ее. В следующем примере я форматирую первую строку блока капителью (small caps) при помощи свойства font-variant(которое, кстати, fop не поддерживает): <fo:block> <fo:initial-property-set font-variant="small-caps"/> This text will be displayed in the result document. The first line will be dis played using small caps. </fo:block> С элементом <fo:initial-property-set>можно применять следующие свойства: • общие свойства доступа: source-document, role; • общие звуковые свойства: azimuth, cue-after, cue-before, elevation, pause-after, pause-before, pitch, pitch-range, play-during, richness, speak, speak-header, speak-numeral, speak-punctuation, speech-rate, stress, voice-family, volume; • общие свойства границ, заполнения и заднего фона: background-attachment, background-color, background-image, background-repeat, background-position-horizontal, background-position-vertical, border-before-color, border-before-style, border-before-width, border-after-color, border-after-style, border-after-width, border-start-color, border-start-style, border-start-width, border-end-color, border-end-style, border-end-width, border-top-color, border-top-style, border-top-width, border-bottom-color, border-bottom-style, border-bottom-width, border-left-color, border-left-style, border-left-width, border-right-color, border-right-style, border-right-width, padding-before, padding-after, padding-start, padding-end, padding-top, padding-bottom, padding-left, padding-right; • общие свойства шрифтов: font-family, font-size, font-stretch, font-size-adjust, font-style, font-variant, font-weight; • color; • id; • letter-spacing; • line-height; • line-height-shift-adjustment; • relative-position; • score-spaces; • text-decoration; • text-shadow; • text-transform; • word-spacing. На этом мы заканчиваем обзор встроенных форматирующих объектов; в следующих разделах мы рассмотрим подстрочный форматирующий объект — сноски. Создание сносок: <fo:footnote> и <fo:footnote-body>Сноски называют «подстрочными» (out-of-line) форматирующими объектами, потому что они добавляют текст в нижнюю часть страницы. Сноска создается при помощи элемента <fo:footnote>, а текст тела сноски — при помощи элемента <fo:footnote-body>. В текущей спецификации XSL-FO эти элементы не поддерживают никаких свойств. В следующем примере, footnotes.fo(листинг 12.5), я использую две сноски в теле документа и добавляю в них текст. Листинг 12.5. footnotes.fo <?xml version="1.0" encoding="UTF-8"?> <fo:root xmlns:fo="http://www.w3.org/1999/XSL/Format"> <fo:layout-master-set> <fo:simple-page-master margin-right="20mm" margin-left="20mm" margin-bottom="10mm" margin-top="10mm" page-width="300mm" page-height="400mm" master-name="page"> <fo:region-body margin-right="0mm" margin-left="0mm" margin-bottom="10mm" margin-top="0mm"/> <fo:region-after extent="10mm"/> </fo:simple-page-master> </fo:layout-master-set> <fo:page-sequence master-name="page"> <fo:flow flow-name="xsl-region-body"> <fo:block space-after="12pt" font-weight="bold" font-size="36pt" text-align="center"> Using Footnotes </fo:block> <fo:block font-size="24pt"> This: <fo:footnote> <fo:inline>footnote <fo:inline font-size="16pt" vertical-align="super"> 1 </fo:inline> </fo:inline> <fo:footnote-body> <fo:block> 1. Here's the first footnote's text. </fo:block> </fo:footnote-body> </fo:footnote> refers to text at the bottom of this page. </fo:block> <fo:block font-size="24pt"> This second; <fo:footnote> <fo:inline>footnote <fo:inline font-size="16pt" vertical-align="super"> 2 </fo:inline> </fo:inline> <fo:footnote-body> <fo:block> 2. And here's the second footnote's text. </fo:block> </fo:footnote-body> </fo:footnote> also refers to text at the bottom of this page. </fo:block> </fo:flow> </fo:page-sequence> </fo:root> Текст, дополненный верхними индексами для сносок 1 и 2, показан на рис. 12.4. Текст двух сносок внизу той же самой страницы показан на рис. 12.5. 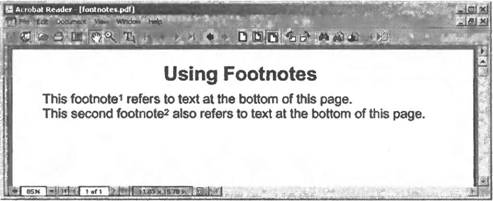 Рис. 12.4. Текст со сносками 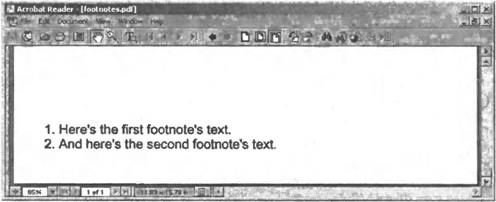 Рис. 12.5. Текст сносок внизу страницы Для создания текста сносок применяется элемент <fo:footnote>. При работе с процессором fop вы должны самостоятельно добавлять фактический номер сноски в верхнем индексе — такой, как 1 или 2. Вот как это выглядит в footnotes.fo, где для создания верхнего индекса я установил свойство vertical-alignвстроенного элемента в «super»: <fo:block font-size="24pt"> This: <fo:footnote> <fo:inline>footnote <fo:inline font-size="16pt" vertical-align="super"> 1 </fo:inline> </fo:inline> . . . </fo:block> Чтобы создать текст сноски, появляющийся внизу страницы, нужно применить элемент <fo:footnote-body>внутри элемента <fo:footnote>. Сам процессор fop не нумерует сноски, поэтому за добавление номеров сносок отвечаете вы: <fo:block font-size="24pt"> This <fo:footnote> <fo:inline>footnote <fo:inline font-size="16pt" vertical-align="super"> 1 </fo:inline> </fo:inline> <fo:footnote-body> <fo:block> 1. Here's the first footnote's text. </fo:block> </fo:footnote-body> </fo:footnote> refers to text at the bottom of this page. </fo:block> Этот код на XSL-FO создает и первый текст со сносками на рис. 12.4, и сам текст первых сносок, показанный на рис. 12.5. Создание ссылок: <fo:basic-link>Еще одним мощным средством XSL-FO является возможность использовать ссылки от документа к документу. В данный момент эта возможность поддерживается в процессоре fop при помощи элемента XSL-FO <fo:basic-link>, который действует во многом похоже на обычную гиперссылку. С элементом <fo:basic-link>можно применять следующие свойства: • общие свойства доступа: source-document, role; • общие звуковые свойства: azimuth, cue-after, cue-before, elevation, pause-after, pause-before, pitch, pitch-range, play-during, richness, speak, speak-header, speak-numeral, speak-punctuation, speech-rate, stress, voice-family, volume; • общие свойства границ, заполнения и заднего фона: background-attachment, background-color, background-image, background-repeat, background-position-horizontal, background-position-vertical, border-before-color, border-before-style, border-before-width, border-after-color, border-after-style, border-after-width, border-start-color, border-start-style, border-start-width, border-end-color, border-end-style, border-end-width, border-top-color, border-top-style, border-top-width, border-bottom-color, border-bottom-style, border-bottom-width, border-left-color, border-left-style, border-left-width, border-right-color, border-right-style, border-right-width, padding-before, padding-after, padding-start, padding-end, padding-top, padding-bottom, padding-left, padding-right; • общие встроенные свойства встроенных полей: space-end, space-start; • общие свойства относительного расположения: top, right, bottom, left, relative-position; • alignment-adjust; • alignment-baseline; • baseline-shift; • destination-placement-offset; • dominant-baseline; • external-destination; • id; • indicate-destination; • internal-destination; • keep-together; • keep-with-next; • keep-with-previous; • line-height; • line-height-shift-adjustment; • show-destination; • target-processing-context; • target-presentation-context; • target-stylesheet. Следующий пример, links.fo(листинг 12.6), содержит ссылку на документ PDF, созданный ранее в этой главе, graphics.pdf. Листинг 12.6. links.fo <?xml version="1.0" encoding="UTF-8"?> <fo:root xmlns:fo="http://www.w3.org/1999/XSL/Format"> <fo:layout-master-set> <fo:simple-page-master margin-right="20mm" margin-left="20mm" margin-bottom="10mm" margin-top="10mm" page-width="300mm" page-height="400mm" master-name="page"> <fo:region-body margin-right="0mm" margin-left="0mm" margin-bottom="10mm" margin-top="0mm"/> <fo:region-after extent="10mm"/> </fo:simple-page-master> </fo:layout-master-set> <fo:page-sequence master-name="page"> <fo:flow flow-name="xsl-region-body"> <fo:block space-after="12pt" font-weight="bold" font-size="36pt" text-align="center"> Using Links </fo:block> <fo:block font-size="24pt"> If you'd like to see some images, click <fo:basic-link external-destination="graphics.pdf"> <fo:inline text-decoration="underline">here</fo:inline> </fo:basic-link>. </fo:block> </fo:flow> </fo:page-sequence> </fo:root> Документ PDF, созданный на основе links.fo, показан на рис. 12.6. Заметьте, что я явно подчеркнул ссылку, чтобы она была больше похожа на гиперссылку. Когда в Adobe Acrobat вы помещаете указатель мыши над ссылкой, он меняет свою форму и становится в точности такой формы, которую Internet Explorer использует для гиперссылок, как показано на рис. 12.6. При щелчке на ссылке Acrobat переходит на graphics.pdf(который для работы примера нужно поместить в тот же каталог, что и links.pdf), отображая этот новый документ. 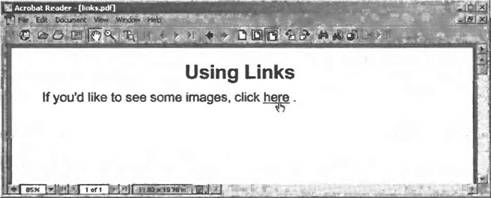 Рис. 12.6. Поддержка ссылок в XSL-FO В данном случае создать ссылку очень просто — достаточно установить свойство external-destinationэлемента <fo:basic-link>в «graphics.pdf»: <fo:block font-size="24pt"> If you'd like to see some images, click <fo:basic-link external-destination="graphics.pdf"> . . . </fo:basic-link>. </fo:block> Теперь осталось только добавить подчеркнутый текст, чтобы пользователь мог щелкнуть по нему и перейти к новому документу. Конечно, не обязательно выделять текст подчеркиванием; но иначе ничто не будет указывать на то, что текст является ссылкой, — за исключением указателя мыши, который изменит форму при перемещении над текстом. Подчеркнутый текст можно добавить следующим образом: <fo:block font-size="24pt"> If you'd like to see some images, click <fo:basic-link external-destination="graphics.pdf"> <fo:inline text-decoration="underline">here</fo:inline> </fo:basic-link>. </fo:block> Пока в XSL-FO реализованы только обычные ссылки (basic link), как показано в примере. Но если вы знакомы со спецификациями XML для XPointer и XLink, вам следует ожидать в будущем значительного развития в этой области. Создание колонокПри помощи XSL-FO можно разбить текст на колонки. Создать колонки несложно, нужно только воспользоваться свойствами column-countи column-gapэлемента <fo:region-body>и предоставить все остальное процессору XSL-FO. Давайте рассмотрим пример, columns.fo. Чтобы разбить текст на две колонки с расстоянием в четверть дюйма между ними, я установил свойство column-countв «2», а свойство column-gapв «0.25in»: <?xml version="1.0" encoding="UTF-8"?> <fo:root xmlns:fo="http://www.w3.org/1999/XSL/Format"> <fo:layout-master-set> <fo:simple-page-master margin-right="20mm" margin-left="20mm" margin-bottom="10mm" margin-top="10mm" page-width="300mm" page-height="400mm" master-name="page"> <fo:region-body margin-top="3cm" margin-bottom="2cm" column-count="2" column-gap="0.25in"/> <fo:region-before extent="3cm"/> <fo:region-after extent="2cm"/> </fo:simple-page-master> </fo:layout-master-set> . . . Теперь осталось только вывести в этих колонках какой-либо текст; заметьте, что я также создаю заголовок при помощи элемента <fo:static-content>, о котором будет еще сказано в следующем разделе (листинг 12.7). Листинг 12.7. columns.fo <?xml version="1.0" encoding="UTF-8"?> <fo:root xmlns:fo="http://www.w3.org/1999/XSL/Format"> <fo:layout-master-set> <fo:simple-page-master margin-right="20mm" margin-left="20mm" margin-bottom="10mm" margin-top="10mm" page-width="300mm" page-height="400mm" master-name="page"> <fo:region-body margin-top="3cm" margin-bottom="2cm" column-count="2" column-gap="0.25in"/> <fo:region-before extent="3cm"/> <fo:region-after extent="2cm"/> </fo:simple-page-master> </fo:layout-master-set> <fo:page-sequence master-name="page"> <fo:static-content flow-name="xsl-region-before"> <fo:block text-align="center" font-size="36pt" font-family="sans-serif" line-height="48pt"> Creating Columns </fo:block> </fo:static-content> <fo:flow flow-name="xsl-region-body"> <fo:block font-size="24pt" font-family="sans-serif" space-after="15pt"> Sample Text. Sample Text. Sample Text. Sample Text. Sample Text. Sample Text. Sample Text. Sample Text. Sample Text. Sample Text. Sample Text. Sample Text. Sample Text. Sample Text. Sample Text. Sample Text. Sample Text. Sample Text. Sample Text. Sample Text. Sample Text. Sample Text. Sample Text. Sample Text. Sample Text. Sample Text. Sample Text. Sample Text. Sample Text. Sample Text. Sample Text. Sample Text. Sample Text. Sample Text. Sample Text. Sample Text. Sample Text. Sample Text. Sample Text. Sample Text. Sample Text. Sample Text. Sample Text. Sample Text. Sample Text. Sample Text. Sample Text. Sample Text. Sample Text. Sample Text. Sample Text. Sample Text. Sample Text. Sample Text. Sample Text. Sample Text. Sample Text. Sample Text. Sample Text. Sample Text. Sample Text. Sample Text. Sample Text. Sample Text. Sample Text. Sample Text. Sample Text. Sample Text. Sample Text. Sample Text. Sample Text. Sample Text. Sample Text. Sample Text. Sample Text. Sample Text. Sample Text. Sample Text. Sample Text. Sample Text. Sample Text. Sample Text. Sample Text. Sample Text. Sample Text. Sample Text. Sample Text. Sample Text. Sample Text. Sample Text. Sample Text. Sample Text. Sample Text. Sample Text. Sample Text. Sample Text. Sample Text. Sample Text. Sample Text. Sample Text. Sample Text. Sample Text. Sample Text. Sample Text. Sample Text. Sample Text. Sample Text. Sample Text. Sample Text. Sample Text. Sample Text. Sample Text. Sample Text. Sample Text. Sample Text. Sample Text. Sample Text. Sample Text. Sample Text. Sample Text. Sample Text. Sample Text. Sample Text. Sample Text. Sample Text. Sample Text. Sample Text. Sample Text. Sample Text. Sample Text. Sample Text. Sample Text. Sample Text. Sample Text. Sample Text. </fo:block> </fo:flow> </fo:page-sequence> </fo:root> Результат обработки этого документа, columns.pdf, показан на рис. 12.7. 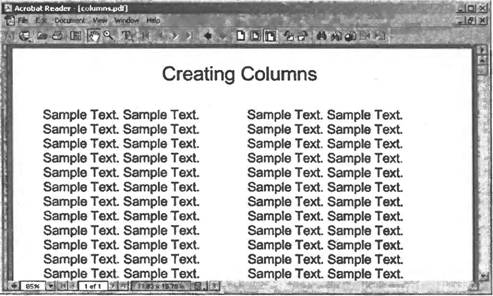 Рис. 12.7. Создание колонок при помощи XSL-FO Последовательности страниц и нумерация страницПока я использовал один и тот же шаблон страницы для всех страниц в рассмотренных нами документах XSL-FO. Если содержимое документа занимает более одной страницы, процессор XSL-FO использует тот же шаблон страницы для всех последующих страниц. Но вам может быть нужно использовать различные шаблоны страницы в разных местах документа. Например, первую страницу нужно отформатировать отлично от следующих. При помощи XSL-FO это можно сделать. Каждый элемент <fo:page-sequence>, который я применял во всех примерах XSL-FO, ссылается либо на шаблон страницы, либо на элемент <fo:page-sequence-master>. При помощи элемента <fo:page-sequence-master>вы можете задать различные шаблоны страницы для последовательности страниц. Пример pages.foпродемонстрирует вышесказанное. Я создам для первой страницы один простой шаблон страницы, «first» (первая), в котором текстовая часть смещена вниз страницы, для чего я устанавливаю свойство margin-topэлемента <fo:region-body>в «50mm»: <?xml version="1.0" encoding="UTF-8"?> <fo:root xmlns:fo="http://www.w3.org/1999/XSL/Format"> <fo:layout-master-set> <fo:simple-page-master margin-right="20mm" margin-left="20mm" margin-bottom="10mm" margin-top="10mm" page-width="300mm" page-height="400mm" master-name="first"> <fo:region-body margin-right="0mm" margin-left="0mm" margin-bottom="10mm" margin-top="50mm"/> <fo:region-after extent="10mm"/> <fo:region-before extent="10mm"/> </fo:simple-page-master> . . . Для всех остальных страниц я создам новый шаблон страницы, «rest» (остальные), в котором текст будет начинаться сверху страницы, для чего я устанавливаю свойство margin-topэлемента <fo:region-body>в «20mm»: <?xml version="1.0" encoding="UTF-8"?> <fo:root xmlns:fo="http://www.w3.org/1999/XSL/Format"> <fo:layout-master-set> <fo:simple-page-master margin-right="20mm" margin-left="20mm" margin-bottom="10mm" margin-top="10mm" page-width="300mm" page-height="400mm" master-name="first"> . . . </fo:simple-page-master> <fo:simple-page-master margin-right="25mm" margin-left="25mm" margin-bottom="15mm" margin-top="15mm" page-width="300mm" page-height="400mm" master-name="rest"> <fo:region-body margin-right="0mm" margin-left="0mm" margin-bottom="10mm" margin-top="20mm"/> <fo:region-after extent="10mm"/> <fo:region-before extent="10mm"/> </fo:simple-page-master> . . . Чтобы создать шаблон последовательности страниц, использующий простые шаблоны страниц «first» и «rest», я применяю элемент <fo:page-sequence-master>: <?xml version="1.0" encoding="UTF-8"?> <fo:root xmlns:fo="http://www.w3.org/1999/XSL/Format"> <fo:layout-master-set> <fo:simple-page-master margin-right="20mm" margin-left="20mm" margin-bottom="10mm" margin-top="10mm" page-width="300mm" page-height="400mm" master-name="first"> . . . </fo:simple-page-master> <fo:simple-page-master margin-right="25mm" margin-left="25mm" margin-bottom="15mm" margin-top="15mm" page-width="300mm" page-height="400mm" master-name="rest"> . . . </fo:simple-page-master> <fo:page-sequence-master master-name="sequence"> . . . </fo:page-sequence-master> </fo:layout-master-set> С элементом <fo:page-sequence-master>вы можете применять следующее свойство: • master-name. Здесь я просто назвал новую последовательность страниц «sequence» (последовательность). Я создаю шаблон последовательности страниц повторяющегося типа, и для задания имен шаблонов страниц в новой последовательности служит элемент <fo:repeatable-page-master-alternatives>: <fo:page-sequence-master master-name="sequence"> <fо:repeatable-page-master-alternatives> . . . </fo:repeatable-page-master-alternatives> </fo:page-sequence-master> Очередное свойство элемента <fo:repeatable-page-master-alternatives>определяет, сколько раз полагается повторять последовательность: • maximum-repeats. Наконец, надо задать шаблоны страниц, которые будут использованы в шаблоне последовательности, при помощи элемента <fo:conditional-page-master-reference>. Этот элемент ссылается на шаблон страницы при помощи свойства master-name, и этот шаблон страницы будет использован при выполнении определенного условия. Чтобы выбрать первую страницу, нужно установить свойство page-positionв «first», а для выбора остальных страниц — в «rest»: <fo:page-sequence-master master-name="sequence"> <fo:repeatable-page-master-alternatives> <fо:conditional-page-master-reference master-name="first" page-position="first"/> <fo:conditional-page-master-reference master-name="rest" page-position="rest"/> </fо:repeatable-page-master-alternatives> </fo:page-sequence-master> С элементом <fo:conditional-page-master-reference>можно применять следующие свойства: • master-name; • page-position; • odd-or-even; • blank-or-not-blank. Теперь при создании последовательности страниц с помощью элемента <fo:page-sequence>я указываю, что процессор XSL-FO должен использовать шаблон последовательности, «sequence», который я только что создал, установив атрибут master-name элемента <fo:page-sequence>: <fo:page-sequence master-name="sequence"> . . . номером текущей страницы, так что установить нумерацию страниц не составит труда. Чтобы вывести номер в верхней части каждой страницы, я создаю верхний колонтитул страницы при помощи элемента <fo:static-content>. Существует два вида потоковых объектов: <fo:static-content>и <fo:flow>. Мы уже видели, как при помощи <fo:flow>добавляются страницы в поток документа. Элемент <fo:static-content>используется для добавления в документ верхних и нижних колонтитулов. С <fo:static-content>можно применять следующее свойство: • flow-name. Для создания колонтитула нужно только поместить элемент <fo:static-content>перед элементом <fo:flow>в последовательности страниц: <fo:page-sequence master-name="sequence"> <fo:static-content flow-name="xsl-region-before"> <fo:block text-align="end" font-size="24pt" font-family="sans-serif" line-height="36pt"> Sample Document p. <fo:page-number/> </fo:block> </fo:static-content> <fo:flow flow-name="xsl-region-body"> . . .
Наконец, нам осталось только включить в pages.fo(листинг 12.8) образец форматируемого текста, так чтобы документ содержал более одной страницы. Листинг 12.8. pages.fo <?xml version="1.0" encoding="UTF-8"?> <fo:root xmlns:fo="http://www.w3.org/1999/XSL/Format"> <fo:layout-master-set> <fo:simple-page-master margin-right="20mm" margin-left="20mm" margin-bottom="10mm" margin-top="10mm" page-width="300mm" page-height="400mm" master-name="first"> <fo:region-body margin-right="0mm" margin-left="0mm" margin-bottom="10mm" margin-top="50mm"/> <fo:region-after extent="10mm"/> <fo:region-before extent="10mm"/> </fo:simple-page-master> <fo:simple-page-master margin-right="25mm" margin-left="25mm" margin-bottom="15mm" margin-top="15mm" page-width="300mm" page-height="400mm" master-name="rest"> <fo:region-body margin-right="0mm" margin-left="0mm" margin-bottom="10mm" margin-top="20mm"/> <fo:region-after extent="10mm"/> <fо:region-before extent="10mm"/> </fo:simple-page-master> <fo:page-sequence-master master-name="sequence"> <fо:repeatable-page-master-alternatives> <fo:conditional-page-master-reference master-name="first" page-position-"first"/> <fo:conditional-page-master-reference master-name="rest" page-position="rest"/> </fо:repeatable-page-master-alternatives> </fo:page-sequence-master> </fo:layout-master-set> <fo:page-sequence master-name="sequence"> <fo:static-content flow-name="xsl-region-before"> <fo:block text-align="end" font-size="24pt" font-family="sans-serif" line-height="36pt"> Sample Document p. <fo:page-number/> </fo:block> </fo:static-content> <fo:flow flow-name="xsl-region-body"> <fo:block font-size="36pt" font-family="Times" text-align="center" space-after="24pt"> Sample Document </fo:block> <fo:block font-size="24pt" font-family="sans-serif" color="gray"> Sample Text. Sample Text. Sample Text. Sample Text. Sample Text. Sample Text. Sample Text. Sample Text. Sample Text. Sample Text. Sample Text. Sample Text. Sample Text. Sample Text. Sample Text. Sample Text. Sample Text. Sample Text. Sample Text. Sample Text. Sample Text. Sample Text. Sample Text. Sample Text. Sample Text. Sample Text. Sample Text. Sample Text. Sample Text. Sample Text. Sample Text. Sample Text. Sample Text. Sample Text. Sample Text. Sample Text. Sample Text. Sample Text. Sample Text. Sample Text. Sample Text. Sample Text. Sample Text. Sample Text. Sample Text. Sample Text. Sample Text. Sample Text. Sample Text. Sample Text. Sample Text. Sample Text. Sample Text. Sample Text. Sample Text. Sample Text. Sample Text. Sample Text. Sample Text. Sample Text. Sample Text. Sample Text. Sample Text. Sample Text. Sample Text. Sample Text. Sample Text. Sample Text. Sample Text. Sample Text. Sample Text. Sample Text. Sample Text. Sample Text. Sample Text. Sample Text. Sample Text. Sample Text. Sample Text. Sample Text. Sample Text. Sample Text. Sample Text. Sample Text. Sample Text. Sample Text. Sample Text. Sample Text. Sample Text. Sample Text. Sample Text. Sample Text. Sample Text. Sample Text. Sample Text. Sample Text. Sample Text. Sample Text. Sample Text. Sample Text. Sample Text. Sample Text. Sample Text. Sample Text. Sample Text. Sample Text. Sample Text. Sample Text. Sample Text. Sample Text. Sample Text. Sample Text. Sample Text. Sample Text. Sample Text. Sample Text. Sample Text. Sample Text. Sample Text. Sample Text. Sample Text. Sample Text. Sample Text. Sample Text. Sample Text. Sample Text. Sample Text. Sample Text. Sample Text. Sample Text. Sample Text. Sample Text. Sample Text. Sample Text. Sample Text. Sample Text. Sample Text. Sample Text. Sample Text. Sample Text. Sample Text. Sample Text. Sample Text. Sample Text. Sample Text. Sample Text. Sample Text. Sample Text. Sample Text. Sample Text. Sample Text. Sample Text. Sample Text. Sample Text. Sample Text. Sample Text. Sample Text. Sample Text. Sample Text. Sample Text. Sample Text. Sample Text. Sample Text. Sample Text. Sample Text.
Sample Text. Sample Text. Sample Text. Sample Text. Sample Text. Sample Text. Sample Text. Sample Text. Sample Text. Sample Text.
Sample Text. Sample Text. Sample Text. Sample Text. Sample Text. Sample Text. Sample Text. Sample Text. Sample Text. Sample Text.
Sample Text. Sample Text. Sample Text. Sample Text. Sample Text. Sample Text. Sample Text. Sample Text. Sample Text. Sample Text.
Sample Text. Sample Text. Sample Text. Sample Text. Sample Text. Sample Text. Sample Text. Sample Text. Sample Text. Sample Text. </fo:block> </fo:flow> </fo:page-sequence> </fo:root> Теперь все готово. Первая страница, созданная pages.fo, показана на рис. 12.8; как можно заметить, текст смещен вниз. 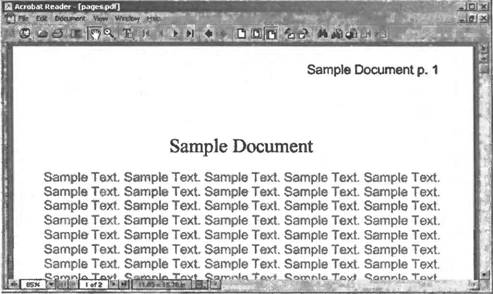 Рис. 12.8. Первая страница, отформатированная при помощи XSL-FO Текст на второй странице начинается сверху, как видно на рис. 12.9. 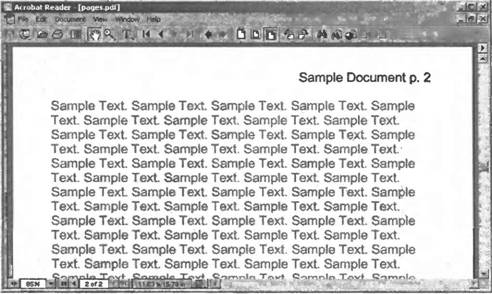 Рис 12.9. Вторая страница, отформатированная при помощи XSL-FO Как можно заметить из листинга 12.8, я включил в pages.foбольшое число строк, не содержащих ничего, кроме слов «Sample Text.», для того чтобы гарантированно получить многостраничный документ. Но для перехода на новую страницу не обязательно располагать большим количеством текста: можно также установить свойство break-afterэлемента <fo:block>в «page», и процессор XSL-FO перейдет на новую страницу после текущего блока: <fo:flow flow-name="xsl-region-body"> <fo:block font-size="36pt" font-family="Times" text-align="center" space-after="24pt"> Sample Document </fo:block> <fo:block font-size="24pt" font-family="sans-serif" color="gray" break-after="page"> Sample Text. Sample Text. Sample Text. Sample Text. Sample Text.
Sample Text. Sample Text. </fo:block> <fo:block font-size="24pt" font-family="sans-serif" color="gray"> Sample Text. Sample Text. Sample Text. Sample Text. Sample Text. Sample Text. Sample Text. Sample Text. Sample Text. Sample Text. Sample Text. Sample Text. </fo:block> </fo:flow> Вот и все. Теперь процессор XSL-FO перейдет на следующую страницу после блока. Для создания разрывов можно использовать следующие свойства и настройки: • break-after. Указывает, что последняя область, созданная при обработке данного форматирующего объекта, будет последней помещенной в определенный контекст. Устанавливается в auto | column | page | even-page | odd-page | inherit; • break-before. Указывает, что первая созданная область должна быть первой, помещенной в определенный контекст. Устанавливается в auto | column | page | even-page | odd-page | inherit. Рассмотрим еще один пример применения последовательностей страниц. Если вы посмотрите на книги, напечатанные на таких западных языках, как английский, немецкий или французский, вы заметите, что страницы с четными номерами, как правило, расположены слева, а страницы с нечетными номерами — справа. Четные и нечетные страницы можно отформатировать по-разному: например, можно задать дополнительное пространство поля у переплета, что даст дополнительное пространство левого поля для нечетных страниц и дополнительное пространство правого поля для четных. Чтобы реализовать такое форматирование, можно применить атрибут odd-or-evenэлемента <fo:conditional-page-master-reference>, устанавливая его в значение «even» или «odd», выбирая соответственно четные или нечетные страницы: <?xml version="1.0" encoding="UTF-8"?> <fo:root xmlns:fo="http://www.w3.org/1999/XSL/Format"> <fo:layout-master-set> <fo:simple-page-master margin-right="50mm" margin-left="20mm" margin-bottom="10mm" margin-top="10mm" page-width="300mm" page-height="400mm" master-name="leftpage"> <fo:region-body margin-right="0mm" margin-left="0mm" margin-bottom="10mm" margin-top="50mm"/> <fo:region-after extent="10mm"/> <fo:region-before extent="10mm"/> </fo:simple-page-master> <fo:simple-page-master margin-right="20mm" margin-left="50mm" margin-bottom="10mm" margin-top="10mm" page-width="300mm" page-height="400mm" master-name="rightpage"> <fo:region-body margin-right="0mm" margin-left="0mm" margin-bottom="10mm" margin-top="20mm"/> <fo:region-after extent="10mm"/> <fo:region-before extent="10mm"/> </fo:simple-page-master> <fo:page-sequence-master master-name="alternatingpages"> <fо:repeatable-page-master-alternatives> <fo:conditional-page-master-reference
<fo:conditional-page-master-reference master-name="leftpage" odd-or-even="even"/> </fo:repeatable-page-master-alternatives> </fo:page-sequence-master> </fo:layout-master-set> <fo:page-sequence master-name="alternatingpages"> . . . Теперь у страниц, расположенных справа, левое поле у переплета книги будет расширено, а у страниц, расположенных слева, также будет расширено правое поле. Как видите, форматирующие объекты — довольно объемная тема, и, как я уже говорил, для большой части материала в этой книге не хватает места. Дополнительные подробности можно узнать на web-узле W3C, www.w3.org/TR/xsl/. Существует не так уж много пакетов программ для работы с форматирующими объектами, хотя в будущем ситуация должна измениться. На этом мы заканчиваем рассмотрение XSL-FO — а вместе с ним и книгу. Вы познакомились со всеми видами XSLT-преобразований: из XML в XML, в HTML, в XHTML, в RTF, в простой текст, в JavaScript, в реляционные базы данных, и теперь — в XSL-FO. Вы увидели все возможные элементы, атрибуты и функции XSLT и рассмотрели много работающих примеров. Теперь осталось только использовать всю эту мощь в работе. Удачи вам в применении XSLT! |
|
||
|
Главная | В избранное | Наш E-MAIL | Добавить материал | Нашёл ошибку | Наверх |
||||
|
|
||||